Memory locations in the Legend of Zelda™: Breath of the Wild are a very important thing for the player to find. Link lost his memories and finding these lost mementos is important in order to discover his past and uncover the story of how things are the way they are, but also, recovered memories take you on the path of finding one of the endings in the game (some would call it the true ending of the game). By recovering all lost memories you will truly set yourself up on being the hero Hyrule needs.
In the Adventurers log, right at the beginning of the game, you’ll see that there are 18 Memories that remain hidden and that you need to recover. As you play through the game, doing the main quest, you’ll go to Kakariko Village and talk to Impa. After you go to Hateno Ancient Tech Lab and finish what you have to do for Purah she will send you back to Impa and she will unlock 12 old camera photos on your Sheikah Slate. These pictures are from Zelda and they point to places that hold old memories that you can unlock. She gives you the Locked Mementos Quest and your task is to find these exact locations and unlock the long lost memories of Link and Zelda. Once you have found all 18 you will get the .
This guide will show you all locations of Memories in Zelda: Breath of the Wild and how to find them.
Recovered memory #1 – Photo 1 – Subdued Ceremony
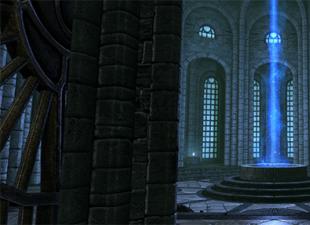
Go to Central Hyrule and enter Hyrule Field. It is the big field in front of Zelda’s castle. Be careful, because the place is crawling with Stalker Guardians and big skeletons. You need to head towards the main gate into the castle and find Sacred Ground Ruins. In the middle of these ruins is the memory recovery spot. Watch it to find out about the ceremony of Zelda making Link a knight.Recovered memory #3 – Photo 2 – Resolve and Grief
 You can get this one fairly early in the game (as soon as you get the paraglider) since it is close to the starting land. You want to start searching from the Great Plateau Tower to north. There is Lake Kolomo in southern Hyrule Field. You want to go along the southwest edge of the lake looking at the woods alongside it and you should see the faint glow of the memory recovery spot. Collect it to see Link and Zelda walk along the lake discussing the divine beasts and the sword.
Other memories are recovered as you do the main story quests and can’t be found otherwise.
После небольшой вступительной заставки идите к панели управления синего цвета, которая находится в этом же помещении, где и очнулся Линк. Около панели начнётся диалог, в ходе которого молодой герой получит «Камень шиика». После этого откроется дверь впереди, поэтому пора выбираться наружу. В коридоре будут стоять сундуки с первым снаряжением, поэтому загляните в них и получите следующие вещи: «Старые штаны» и «Старую рубаху». Одевайтесь, походите к следующей панели чуть дальше впереди, дождитесь окончания заставки и выходите на свежий воздух.
: Пригнувшись, вы медленнее передвигаетесь, но зато вас так будет гораздо сложнее заметить.
Ну что ж, теперь главный герой оказался на территории «Великого плато». Что делать? Первым делом внимательно посмотрите по сторонам, потому что рядом лежит ветка, которую нужно поднять, чтобы было хотя бы чем-нибудь обороняться от врагов. В любом случае повернитесь в правую сторону и спускайтесь вниз к неизвестному персонажу, который был представлен в небольшой заставке. Также по пути можно собирать разнообразные предметы.
: По пути вниз Линк наткнётся на гриб красно-оранжевого цвета, который называется «Хайруловик», поэтому рекомендую собирать такие грибы, поскольку они вполне съедобны и будут восстанавливать по полсердца за раз. К тому же, подобные грибы растут, как правило, вблизи деревьев.
Когда ближе подойдёте к неизвестному старику, собирайте яблоки и поговорите с ним. После разговора обязательно возьмите факел (его можно зажечь от костра, но если убрать его в сумку, огонь погаснет), который находится за ним.
Задание: «В путь с Камнем шиика»
Когда от старика отойдёте немного вперёд, то к Линку вновь обратится голос неизвестной девушки, которая прикажет отправиться к ключевой точке на карте. Однако первым делом обратите своё внимание на пенёк - в него будет воткнут топор лесоруба. Хотя оружие будет медленным и малоэффективным, но оно будет всё равно намного лучше деревянной палки, так что берите его и отправляйтесь к отмеченной точке на карте.
По пути Линк впервые столкнётся с бокоблинами. Первый бой будет простым, поэтому после убийства собирайте все выпавшие предметы и двигайтесь дальше. По пути также можно заметить по левой стороне от дороги два огромных камня, которые можно столкнуть на двух бокоблинов. После убийства можно будет собрать всякие ингредиенты и оружие под названием «Бокопалица», которое может пригодиться в дальнейших приключениях.
: Следите за запасом сил главного героя, потому что если он устанет, то не сможет не только бегать, но и плыть, карабкаться и совершать многие другие действия.
: Прямо около ключевой точки будут и другие бокоблины. Однако у них теперь можно будет добыть «Боколук», который первое время будет играть роль лука, а у одиноко стоящего бокоблина можно будет отобрать «Походный меч» и «Бокощит». Причём всё это снаряжение пригодится на начальных этапах игры.
В целом, в округе будет ещё немало бокоблинов, поэтому, когда доберётесь до нужного места, пройдите в небольшое ущелье между холмами. Так вы найдёте панель, в которую необходимо будет вставить Камень шиика. После начнётся заставка.
Задание: «Заброшенное плато»
«Как только я спустился с башни, появился старик. Он рассказал, что сто лет назад Хайрул был уничтожен Бедствием Ганоном. Чтобы попасть в замок, откуда доносился голос, мне нужно спуститься с плато, а для этого понадобится планер, как у старика. Он согласен отдать его в обмен на какое-то сокровище…»
Итак, по требованию Старика придётся отправиться на поиски сокровища. Нужное место с сокровищем называется «Святилище Оман-Ау» и белобородый дедуля покажет, где находится это место, поэтому отправляйтесь туда. По прибытию на панели управления воспользуйтесь Камнем Шиика. В итоге, откроются не только двери, но и первая точка перемещения. В любом случае, входите внутрь и спуститесь вниз. Начнётся загрузка.
: Не знаете, как потушить горящий щит? На самом деле всё довольно просто, потому что если загорелся щит или даже оружие, тогда достаточно снаряжение убрать в сумку - и огонь погаснет.
Святилище «Оман-Ау» - Испытание: «Магнетизм»
Ну что ж, внутри в святилище первым делом, как обычно, подойдите к панели управления (которая будет иметь орнаменты оранжевого цвета), чтобы получить уникальные способности для Камня шиика Линка. В итоге, главный герой получит умение/способность (как удобней) под названием «Магнезис», которое позволит перемещать металлические предметы: поймав в магнитное поле металлический предмет, вы можете поднимать и свободно перемещать его.
Теперь пришло время воспользоваться Магнезисом, но первым делом обратите внимание на большие две плиты, которые лежат на полу в центре зала - они металлические, поэтому их можно будет поднять и убрать в сторону, тем самым открыв себе путь дальше. После этого прыгайте вниз и идите по линейному коридору, где в конце поднимайтесь по ступеням наверх. Теперь Линку преграждает путь стена из металлических кубов, поэтому убирайте один из них, после чего при помощи него двигайте остальные кубы, либо выстройте своеобразную лестницу или вообще разберите проход полностью - решать, что делать только вам.
В любом случае на той стороне героя ожидает бой с древним механизмом, но ничего сложного: парочка точных ударов мечом или топором быстро выведет его из строя. Кстати, робота можно даже убить при помощи металлического куба. Подбирайте выпавшие предметы и идите дальше. Когда окажитесь около небольшой пропасти, то берите огромную железную плиту сзади переставляйте её на другое место вперед. Получится в итоге своеобразный мостик. Теперь открывайте металлические ворота и пройдите к пьедесталу со статуей. После небольшой финальной речи, Линк получит уникальную награду под названием «Сфера духа». После получения награды начнётся заставка, в ходе которой герой окажется снаружи. Начнётся диалог со Стариком.
: Перед тем, как подойти к статуе и получить «Сферу духа», можно получить ещё и сундук, внутри которого будет лежать «Походный лук». Находится этот сундук с левой стороны перед воротами, которые ведут к говорящей статуе. Чтобы достать этот сундук, необходимо подойти как можно ближе к краю дороги и воспользоваться магнитом, при помощи которого можно будет притянуть к себе сундук и открыть его.
«Когда я вышел из святилища, снова появился старик. Он сказал, что на плато есть ещё три святилища и он даст планер, только если я получу «Сферу духа» в каждом из них. Ещё он посоветовал переместиться на башню с помощью Камня шиика и поискать святилища оттуда»
Задание продолжается и теперь придётся добыть ещё три сферы, поэтому перемещайтесь на башню при помощи быстрого перемещения (телепортации). Наверху воспользуйтесь визором, чтобы поставить метки на следующие три храма. Один храм будет расположен в южной части карты на фоне гор. Второй расположен с левой стороны от собора. И последнее святилище будет расположено с левой стороны от башни в руинах.
: Помните о том, что у каждого оружия есть свой запас прочности. Поэтому чтобы не лишиться важного оружия, всегда старайтесь следить за его состоянием.
Первым делом предлагаю отправиться в Святилище под названием «Джа-Баиж», которое находится в левой стороне от башни в руинах. Однако знайте то, что в руинах есть опасные машины, которые могут без проблем быстро расправиться с молодым героем, поэтому чтобы добраться до святилища следует их обойти.
Святилище «Джа-Баиж» - Испытание: «Взрывная сила»
Как обычно подойдите к панели управления с оранжевым орнаментом, после чего начнётся заставка. Итак, теперь Линк получил «Телебомбу». При помощи этого умения можно будет создавать взрыв на расстоянии. Взрыв будет разрушать предметы и наносит большой урон монстрам. Кроме того, бомбы могут быть как кубическими, так и круглыми - выбирать следует исходя из ситуации.
Breath of the Wild is the first voice-acted Zelda game, but its story is delivered almost entirely through flashback – and you need to unlock each memory. Here’s where to find all of the Recovered Memories to learn the truth of 100 years ago.
Once you visit Impa in Kakariko Village and have all of the basic runes of your Sheikah Slate restored, she offers you a task and triggers a new main quest: you’ll need to locate places you visited in the past in order to reawaken memories of 100 years ago. This is how much of Breath of the Wild’s story is delivered, through lovely context-filled flashbacks. They’re well worth viewing, though getting access to them can be a little bit frustrating depending on how much you like easter egg hunts.
The Legend of Zelda: Breath of the Wild: Locked Memories Quest – where to find all the recovered memories
Impa will unlock 12 photos in your Sheikah Slate, and each points to a different part of the world. When visited each will trigger the awakening of a major event from 100 years prior for Link, offering important information.
There are 18 recovered memories total. Twelve are found through the Sheikah Slate, one is revealed to you when the other 12 have been found, and the others are given via story events. Here’s how to get them all.
Recovered Memories #2, #4, #6, #10 and #18
As an important note, the second, fourth, sixth, tenth and eighteenth recovered memories will be awarded to you over the course of the game’s main story – so don’t worry about these. The eighteenth and last in particular is optional and will be revealed generally very late on (though as always with Breath of the Wild, it depends how you play) – it triggers if and when you pick up . They’re not part of this main quest.
Subdued Ceremony / Photo 1 – Recovered Memory #1


This memory is the first photo on your Sheikah Slate and is is pretty easy to find – if you look on the map, there’s a circular sort of place right in front of Hyrule Castle. This is the Sacred Ground Ruins. Head there and you’ll find this memory – it’s an interesting one, since it introduces you to some very key characters. There are a number of guardians around this area, so be careful when you go to grab this one, especially if you do it early on.
Recovered Memory #3 / Photo 2 – Resolve and Grief


This memory is the second photo on the Sheikah Slate. It’s found just north of the plateau where you started the game. Look on the map for the area in Central Hyrule marked Hyrule Field. Zoom in – you’ll find the Exchange Ruins, Aquame Lake, the Forest of Time and the Gatepost Town Ruins. The nearest landmarks are the Oman Au Shrine and the Great Plateau Tower – Lake Kolomo is slightly north from both of these. The memory overlooks Lake Kolomo, looking towards the Dueling Peaks – the route to Karariko.
Subscribe to the VG247 newsletter Get all the best bits of VG247 delivered to your inbox every Friday!
Enable JavaScript to sign up to our newsletter
Recovered Memory #5 / Photo 3 – Zelda’s Resentment


This is the 3rd photo in the Sheikah Slate. You’ll find this memory in the Tabantha area of the map. Just to the south of Piper Ridge (which is to the West of Tabantha Great Bridge), you’ll find an area called Ancient Columns. There’s a Shrine here – the challenging Tena Ko’sah Shrine. The memory spot is right in front of said shrine.
Recovered Memory #7 / Photo 4 – Blades of the Yiga


This memory is associated with the 4th photo in the Sheikah Slate. It’s found at the Kara Kara Bazaar. Look at the Gerudo Desert on the map and then find Gerudo Town and Gerudo Desert Gateway. The Bazaar is at the halfway point between the two, and is difficult to miss. The memory trigger can sometimes be hard to see in the bright desert heat, but it’s on the right side of the Bazaar when you look from the main shop.
Recovered Memory #8 / Photo 5 – A Premonition


This memory is the 5th on the Sheikah Slate and is found in the Eldin Canyon area, the area on the outskirts of Death Mountain. The closest recognisable landmarks are the Woodland Tower and Minshi Woods – this is to the east of those. It’s also to the north and slightly to the east of Pico Pond and the Mirro Shaz Shrine. It’s up on the hills overlooking Hyrule Castle.
Recovered Memory #9 / Photo 6 – Silent Princess


This memory is the 6th image on the Sheikah Slate and is found just north of Central Hyrule and Hyrule Castle, between Hyrule Ridge and the Great Hyrule Forest. The nearest landmarks are the Monya Toma Shrine and the Serenne Stable. Head a little south east from these; there are two small pools that are (if you zoom in) near Irch Plain.
Recovered Memory #11 – Shelter from the Storm / Photo 7


This memory overlooks Lake Hylia’s enormous bridge, but is a little distance away. It’s the 7th memory on the Sheikah Slate. It’s found on a hill that’s sandwiched between Scout’s Hill and Deya Lake. These hills are marked on the map as the Hills of Baumer. If you look for Scout’s Hill on the map, it’s just the other side of the Hylia river.
Recovered Memory #12 / Photo 8 – Father and Daughter


This memory is a risky one to get – it’s in Hyrule Castle, AKA the final dungeon of the game, of sorts. The thing is, you can explore Hyrule Castle any time without consequence so long as you don’t go to Ganon’s lair, though you do so at your own risk as deadly enemies are all over. There are multiple ways in, such as via swimming up waterfalls, going to the docks or gliding in from afar to avoid the attention of guardians or simply stocking up on health items and making a full-on assault. The castle itself is threatening and oppressive but also absolutely surviveable for a brief visit from early on.
Once inside, this memory is found on the Western side of the castle, high up. As far as I can tell you’ll need to head outside and do at least a bit of dodging guardians. In a Western Keep sort of area look for a room you’ll notice is Zelda’s quarters – there’s a diary written by her in here. Climb the wall to the second floor here and you’ll notice a small walkway – the memory takes place here. Consult our images, as finding the exact room can be a challenge.
Recovered Memory #13 / Photo 9 – Slumbering Power


This memory is found in the Akkala Region. It’s the 9th photo on the Sheikah Slate. Find the North Akkala Foothill – there you’ll be able to see the East Akkala Stable and Katosa Aug Shrine. Head directly West from there towards North Akkala Valley and Ordorac Quarry. Nestled between these two is the Spring of Power, and this is where the memory is recovered.
Recovered Memory 14 / Photo 10 – To Mount Lanaru


You’ll be able to find this memory, the 10th photo on the Sheikah Slate, up in the Safula Hill area to the west of Central Hyrule and east of Satori Mountain. Among this area is the Sanidin Park Ruins – once you get onto these high mountains look out for the ruins with a huge horse statue – this is where this memory is found.
Recovered Memory #15 / Photo 11 – Return of Calamity Ganon


This memory is the 11th on the page of memory photos in your Sheikah Slate. It’s found in the shadow of Lanayru. To the West of the mountain you’ll find Naydra Snowfield – this is actually really very useful, and the snowfield leads past Purifier Lake into Lanayru Promenade. It’s between these points at Lanayru Road – East Gate that you’ll find this memory to recover. Things got pretty bad, huh.
Recovered Memory #16 / Photo 12 – Despair
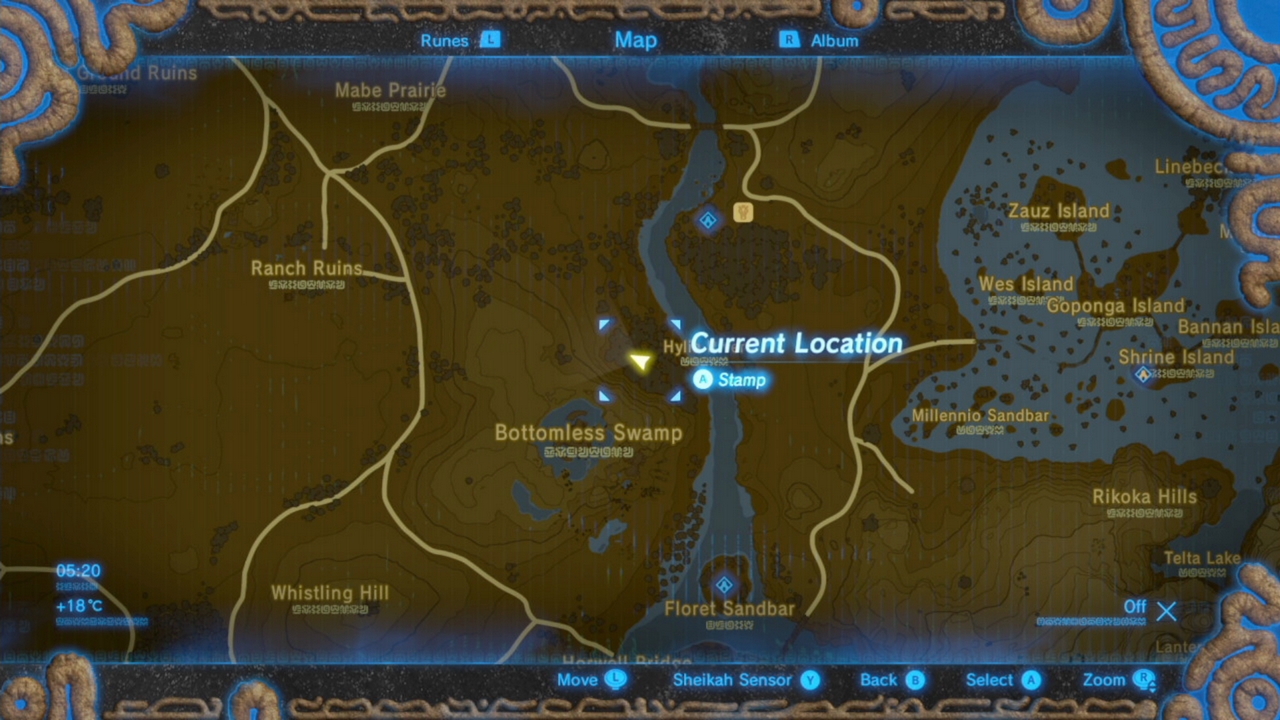

This memory is the final one, the 12th on the Sheikah Slate pictures. It’s located just to the North-East of the Bottomless Swamp on the east side of Hyrule Field. If you look for some text on the map that says ‘Hylia River’ in between the Bottomless Swamp and the Kaya Wan Shrine and Wetland Stable, this memory is discovered right by this text in a small forested area.
Recovered Memory #17 – Zelda’s Awakening


The final memory that isn’t recovered naturally through story progression, this one isn’t backed up by a photo. After recovering all of the other 12 memories in the Sheikah Slate photos, return to Impa. She will reveal this final memory location to you… and it’s been under your nose since she first gave you back these memories.
Once she’s shown you the image, head south from Kakariko, back over the bridge towards the Dueling Peaks Stable and Ha Dahamar Shrine. To the east of this is Fort Hateno, and between the two is the Ash Swamp area. The final memory is found in this location, the place where things came to a head 100 years ago.